Building My Own Static Site Generator
They say that tech users only make two kinds of blogposts:
- normal blogposts, and
- blogposts about how they made their website.
This post is one of the latter :)
Introduction
I'm a frontend engineer by trade. Most of what I do on a day-to-day basis is building websites and mobile apps. It goes without saying that I love learning about web technologies and building websites from scratch.
I've taken this website through several different iterations over the years, from Wordpress, to Markdown files hosted on Evernote, then to writing plain HTML, and finally migrating towards static site generators. A dream of mine has been to hand-craft my own static site generator but it always seemed too complicated or daunting to attempt.
Today in 2026, I can say with confidence that I finally understand how to build a static site generator and have built some static site generators of my own. It's been an arduous journey and I want to walk you through the architectural design of my static site generator and some neat things I've learned throughout the process.
Criteria
A static site generator is a program that takes formatted inputs and compiles them to produce plain HTML, CSS, and JS. The formatted inputs often take the form of Markdown files and a templating language, but there's a static site generator that exists for practically every programming language imaginable so there's a lot of options.
When I first moved to static site generation I devised criteria for what I was looking for in a static site generator and what were deal breakers to me:
- Static site generation should be fast. One second feels like an eternity to me, especially if I'm hot-reloading on a development server.
- A development server should be included. If there's no way to preview your changes, it becomes tedious to update your website.
Based on these criteria I originally went with Next.js. It was an extremely popular tool at the time (and unfortunately still is) and coincided with the technology I was using at work. However, this predated Next.js's static page generation. I quickly became burdened with constantly maintaining my VPS when all I wanted to do was display text and images on a webpage. I added one more criteria for my search and ventured on:
- Do not ship with JavaScript by default. JavaScript should only be necessary for dynamically generated content.
This brought me to Eleventy. Eleventy was able to produce a true static site but I found the build times to be horrendously long when my website was less than 100 pages. I moved on.
At some point I landed on Hugo and fell in love. It was impressively fast and provided flexibility to generate any format of output I wanted. Around this time I decided to simplify the contents of my website and page and dual-host my website on both HTTP and Gemini. However, this was both a blessing and a curse. The longer I catered to Gemini, the harder it became to add new content without using custom scripting logic to transform gemini files into a format Hugo recognized and my website devolved into a collection of hastily slapped together shell scripts and eventually a custom fork of Hugo. I felt restricted by the hierarchical structure that Hugo required of every project. Again, I added one more criteria to my list and moved on:
- Use generalized framework-agnostic formats. Avoid custom templating logic when possible.
Next came Astro. At the time it felt like the best balance between minimal output and modern JSX syntax for constructing a site. I was pleased with its rich data schema validation and the filesystem-based router popularized by Next.js. Even then, I felt a compelling urge to move away from Node.js dependency hell. Because the Node.js ecosystem moves so fast, every two weeks I would encounter a new vulnerability warning for a package I wasn't even sure I was using. I learned that less dependencies means less maintenance and more reproducibility (good luck running a 10 year old node project). I added two more criteria:
- Avoid bloat. Keep websites as lean as possible even before build time.
- Avoid dependencies. Dependencies are vulnerabilities waiting to happen.
It was at this time that by chance I stumbled into Lume.
Lume
Lume is my favorite static site generator I've used up to this point. Lume is built upon Deno, an alternative successor to Node.js. One of Deno's bigger selling points to me was reproducible installs: they offered vendoring, global caching, and a URL import system when Node didn't have those capabilities. I switched to Lume and was pleasantly surprised with the results.
Lume operates on two philosophies:
- everything is a plugin
- hook into build stages to change what you need
This made it a pleasure to add the bare minimum plugins and write preprocess/postprocess hooks to generate the exact output format I wanted. You can support any input format (JSON, Markdown, HTML, JSX) and apply any number of community-provided plugins. Here are some of my favorites:
- ePUB - generate an
.epubfile from HTML - Cache Busting - Prepend a hash to paths to cache bust for static assets
- Check URLs - Parse all URLS and check for broken links
- Redirects - generate redirect pages
- ssx - a JSX alternative in the same spirit as my own sjsx project
I used Lume for almost two years before I decided to switch. The deciding factor for me was not the architectural design of Lume, but rather, the performance of each build. Although it may not seem like it, this website is moderately large. At the time I'm writing this, it contains around 600 generated pages. In Lume, a single build of this site would take approximately 3-6 seconds. Unfortunately this did not meet my criteria for a static site generator.
I also stopped avoiding dependencies. I was reliant on a plethora of Lume plugins, a few of which came from NPM. My vendored dependencies were slowly becoming the weight of a black hole again.
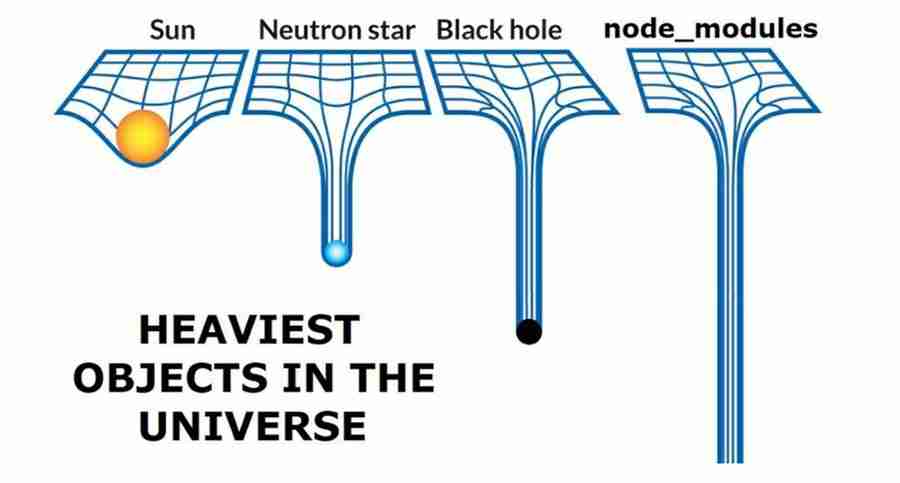
I realized I needed to make changes to keep my static site painless so I moved on. At this point I decided that it was finally time to attempt building my own static site generator.
ss
ss (short for "static site") is my first attempt to create my own static site generator. Learning from Lume's example, I decided to build a static site generator in JavaScript with a similar architectural design: keep the base minimal (everything is a plugin) and build the site in stages: preprocess and process.
In preprocess, the pages directory is walked and each input file is recorded as a Page and classified with type asset, redirect, page, or genpage. During this stage ss also preloads templates, transforms, and redirects. Each input type is parsed according to a preconfigured Processor. I only have two processors currently: one for JSX and one for Markdown. The remaining files are interpreted as static assets.
In process, each page is transformed into its final output based on its type:
- An
assetis copied from source to destination with no modifications. - A
redirectgenerates a simple HTML redirect page using<meta http-equiv="refresh">. - A
pagerepresents a single page. Each page is converted to HTML via its corresponding processor, then transformed through any number of transforms, and finally written to its destination. - A
genpagerepresents multiple generated pages. Each generated page is processed as a singlepage.
Generated Pages
Declaring multiple pages within a single input file is tricky. For context, ss generates single pages using a JSX default export:
export default function() {
  return (
    <section>
      <h1>My page</h1>
      <p>Hello, world!</p>
    </section>
  )
}
To generate multiple pages in a single file, I utilize JavaScript generators. Generator functions in JavaScript act similar to iterators in other programming languages where multiple values can be yielded as an output value.
export function* generator() {
  yield 4;
  yield 7;
  yield 28;
}

const iter = generator();

console.log(iter.next().value); // 4
console.log(iter.next().value); // 7
console.log(iter.next().value); // 28
console.log(iter.next().done); // true

// or accessed via loop

for (const val of generator()) {
  console.log(val);
}
By yielding a basic page structure, we can generate multiple pages in a single file:
export default function* () {
  yield {
    url: "/about/",
    content: (
      <h1>About</h1>
    ),
  };
  yield {
    url: "/contact/",
    content: (
      <h1>Contact</h1>
    ),
  };

  for (let i = 0; i < 10; i++) {
    yield {
      url: "/page/" + i,
      content: (
        <h1>Page {i}</h1>
      )
    };
  }
}
This makes ss extremely flexible. Any combination of outputs can be generated with any number of inputs. I'm still using ss for all of my website projects to this day.
htmlc
Although ss fits nearly all my needs as a static site generator, there are two issues I encountered which forced me to reconsider my approach:
- I still rely on dependencies. I tried to avoid dependencies as much as possible, but the core transformation logic I use for inserting new HTML nodes into pages relies on a DOM parser. I've switched to the smallest and fastest DOM parser I could find but it's still heavy.
- I experience slow build times. My current average build time for this site is 1-4 seconds. It's noticeably slow and frankly unacceptable.
I decided a few months ago that I wanted to try rebuilding my static site generator from scratch one more time, this time using a single compiled binary with all batteries included. I've been calling this new static site generator htmlc (short for "HTML compiler").
Htmlc is a work-in-progress static site generator written in Zig intended to meet all of the criteria above including the following new criterion:
- use existing HTML syntax. A custom templating system (JSX, Nunjucks) should not be used because it requires learning and customizing IDEs for a specific project.
I want to avoid downloading tree-sitter queries and configuring LSPs for the purpose of running my site: I want to input HTML and expect HTML in return. The reason is that HTML is universally portable not specific to any static site generator. The skills I gain from writing plain HTML transfers to other disciplines and programs.
Markdown via mdz is the only exception to this rule. I find it faster to write Markdown for long detailed documents such as blogposts, reserving HTML as the glue between posts. Markdown is also universally portable.
Adhering to the rule above, I ended up writing my own HTML parser that I'm very proud of. It has already caught syntax issues with my website that I had never noticed. Because it is compiled, It also runs fast: I can build all 600 pages in less than 200 milliseconds. This gives me confidence that this new approach is a good change for the foreseeable future.
Input files are converted into pages then written to output files without preprocess or process steps, and each file is categorized based on its file extension. This makes htmlc much leaner and easier to understand. There's a single build loop for each page. This unfortunately means that output customization is not as simple as with ss, but I think the sacrifice is worth it.
I'm actively working out bugs and adding the correct subset of features so it may be a while before I completely switch over to htmlc; however, I would like to share some of the tricks and details I've learned about Zig and HTML in the process.
Boolean Attributes
Did you know there are multiple ways to write a boolean attribute?
<button disabled=""></button>
<button disabled></button>
<button disabled="disabled"></button>
<button disabled=disabled></button>
It's cases like these that make me wish we could semver HTML. It's no wonder everyone defaults to writing JSX.
HTML Preserves Whitespace
HTML preserves all whitespace between tags even if the space is not visible in the browser. For example, this document will print all whitespace and newlines between elements:
<!DOCTYPE html>
<html>
  <head>
    <title>test</title>
  </head>
  <body>
    <div>element 1</div>

    <p>element 2</p>

    <script>
      console.log(document.body.textContent)
    </script>
  </body>
</html>
If the browser did not record all whitespace, CSS like white-space: pre would not function properly. HTML also renders elements differently depending on the whitespace between inline elements. For example, notice how whitespace between <li> elements affect how they appear to the user:
<style>
  .parent { padding: 0; }
  .parent li {
    display: inline-block;
    background: salmon;
    border: 1px solid #000;
    width: 50px;
    height: 50px;
  }
</style>
<ul class="parent">
  <li></li>
  <li></li>
  <li></li>
  <li></li>
</ul>
<ul class="parent">
  <li></li><li></li><li></li><li></li>
</ul>
As a result, HTML minifiers and transpilers can produce confusing spacing issues if you're not careful. JSX's solution to this problem is to litter your codebase with {" "} which I dislike.
ShadowRoot Mode
The <template> tag allows you to write reusable components in vanilla HTML using web components as glue. By default templates are hidden from view until cloned via .cloneNode()/.importNode(), but passing a shadowrootmode attribute immediately attaches the template to the DOM, replacing its contents. Try inspecting the following elements using browser developer tools:
<div>
  <template shadowrootmode="open">
    <div style="padding:1rem;border: 2px dashed red">
      <slot></slot>
      <slot name="end"></slot>
    </div>
  </template>
  <p slot="end">without JavaScript!</p>
  <p>this content is slotted within</p>
  <p>an instantiated shadow DOM</p>
</div>
without JavaScript!
this content is slotted within
an instantiated shadow DOM
This is called a Declarative Shadow DOM. I used this principle to design my own template fragments in htmlc.
Chained Reader/Writer Streams
How can you chain multiple Reader/Writer streams in Zig? If you're not too worried about input size you can write to a fixed writer, then use the same buffer as a fixed reader for the next stream:
fn process_data(r: *Io.Reader, w: *Io.Writer) !usize {
  var buf: [4096]u8 = undefined;
  var tmp_w = Io.Writer.fixed(&buf);

  const len = try stream_data_one(r, &tmp_w); // stream 1

  try tmp_w.flush();
  var tmp_r = Io.Reader.fixed(buf[0..len]);

  return stream_data_two(&tmp_r, w); // stream 2
}
If you do need to worry about input size and can afford to allocate memory, you can use Io.Writer.Allocating as the temporary writer.
For Loop Async I/O
Async I/O is a relatively new addition to Zig and there's not very much documentation around it. I wanted to use process multiple pages asynchronously in htmlc and ended up with something like this:
const DoWorkResult = Allocator.Error!void;

// simulate work
fn do_work(gpa: Allocator, input: []const u8) DoWorkResult {
    const duped = try gpa.dupe(u8, input);
    defer gpa.free(duped);
    std.log.debug("duplicated {s}", .{input});
}

pub fn main(init: std.process.Init) !void {
    const gpa = init.gpa;
    const io = init.io;

    var future_list: std.ArrayList(Io.Future(DoWorkResult)) = try .initCapacity(gpa, 0);
    defer future_list.deinit(gpa);
    defer for (future_list.items) |*future| future.cancel(io) catch {};

    for ([_][]const u8{
        "hello",
        "world",
        "goodbye",
        "world2",
    }) |input| {
        try future_list.append(gpa, io.async(do_work, .{ gpa, input }));
    }

    for (future_list.items) |*future| try future.await(io);
}
This works but it's a bit noisy. There's the additional overhead of allocating an Io.Future for every processed item, not to mention the fact that we must loop over all items twice.
If you don't care about output values you can use an Io.Group to batch handle items without the overhead. The work must be coercible to Io.Cancelable!void.
// simulate work
fn do_work(gpa: Allocator, input: []const u8) Io.Cancelable!void {
    const duped = gpa.dupe(u8, input) catch return Io.Cancelable.Canceled;
    defer gpa.free(duped);
    std.log.debug("duplicated {s}", .{input});
}

pub fn main(init: std.process.Init) !void {
    const gpa = init.gpa;
    const io = init.io;

    var group: Io.Group = .init;
    defer group.cancel(io);

    for ([_][]const u8{
        "hello",
        "world",
        "goodbye",
        "world2",
    }) |input| {
        group.async(io, do_work, .{ gpa, input });
    }

    try group.await(io);
}
If you need to capture the result of each item you can write results to an Io.Buffer which is guaranteed to be thread-safe.
Defer and Errdefer on Allocation
There's a memory leak in the following Zig code. Can you spot it?
const Data = struct {
    str: []u8,
    pub fn init(gpa: Allocator) !*Data {
        const data = try gpa.create(Data);
        const str = try gpa.dupe(u8, "hello");
        data.* = .{ .str = str };
        return data;
    }
};

pub fn main(init: std.process.Init) !void {
    const gpa = init.gpa;
    const data = try Data.init(gpa);
    defer gpa.destroy(data);
    defer gpa.free(data.str);
}
Even though all memory gets freed in the happy path with defer, the error paths can leak memory! The memory for Data will never be deallocated in the event that gpa.dupe fails. This is where errdefer comes in. With errdefer we can defer logic only in the event of an error. A better way to write this init function would be the following:
pub fn init(gpa: Allocator) !*Data {
    const data = try gpa.create(Data);
    errdefer gpa.destroy(data); // cleanup when error occurs
    const str = try gpa.dupe(u8, "hello");
    errdefer gpa.free(str); // cleanup when error occurs
    data.* = .{ .str = str };
    return data;
}
It's really easy to miss these cases without tests. Here's a good rule of thumb to check your work: every try that allocates memory must be followed by defer or errdefer.
Conclusion
My website has been a journey of learning and growth and has taught me many things about web technology and minimalism. I'm fully aware no one will use my static site generator but me... and that's ok. At the end of the day, I love working on passion projects like these and I will continue to work on more of them as long as I am physically able to do so.